This guide is best for IT Administrators and Software Developers
This tool cannot be implemented in static websites
In order for your preferred lender results and notification routing channels to be used, some additional configuration is required in YOUxManage.
The YOUxManage configuration requirements are not covered in this guide however, we would be happy to assist you by calling the YOUx "manage" support team on 1300 301 720 or by lodging a support enquiry at the bottom of this page.
Your Integration Companion
Our Terminology
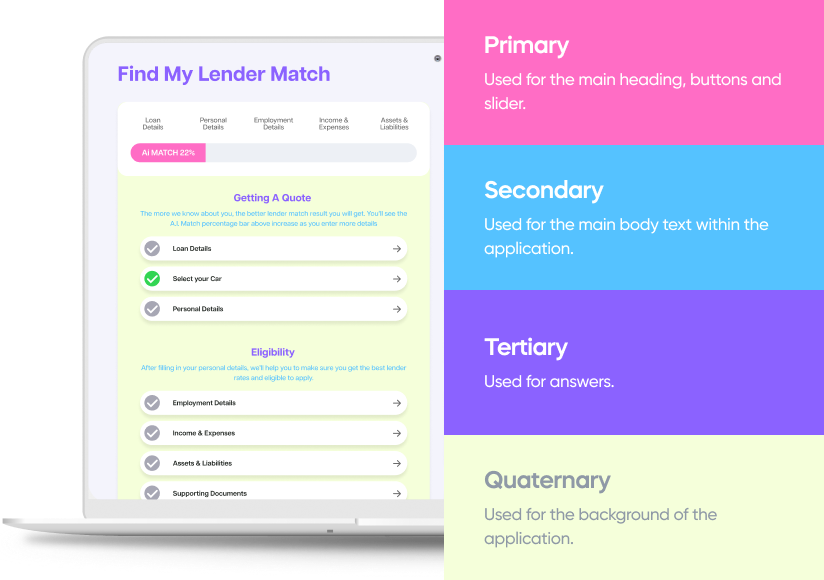
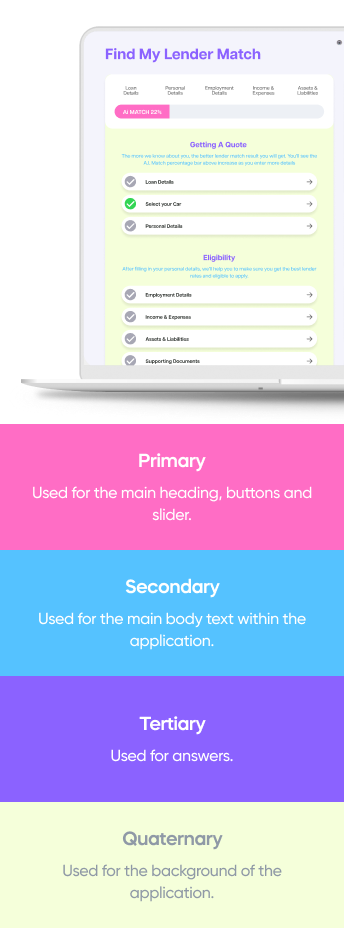
In the YOUx widget, we use four different "Hex" colours to customise the experience.
Hex colures are very efficient, using just these seven characters to represent more than 16 million colours. And differentiating between these colours is a straightforward process. The variable HEX colour parameters are categorised as follows:
Note: These different elements are covered in more detail during Step 1.
The partner ID is a specific GUI used by the YOUxManage platform to route application and opportunity data generated by the widget. The "partner ID" used in the widget is the same partner ID shown for all inbound information appearing in YOUxManage. This ID can be found in the righthand navigation pane under "manage backend/ partners/ view all"
version (EG, SKYNET, MULTI_TENNANT, HAL_9000)
The target IQ system (or youX manage system) is required to chanel the leaads to the correct parter_ID
(parent page URL)
This is the domain that the widget is installed on. This value is used for avariety of different fucntions and will also need to be "whitelisted" by the youX team prior to installation.
Notes:
Different to source_URL, source is used when multiple widgets are installed on the same primary domain. This functionality allows tracking of multiple different installations under the same partner_ID.
Step 1
Complete the onboarding form and ensure you advise the following information:
#HEX codes
Choose your designs colour scheme.

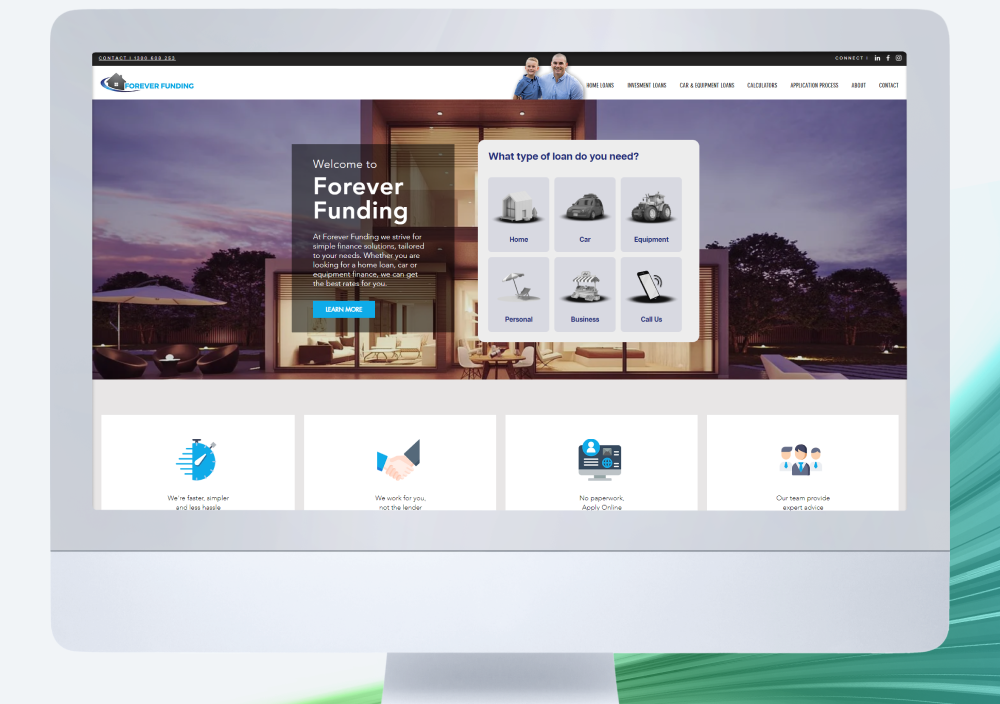
Page source URL
Provide your parent page URL.

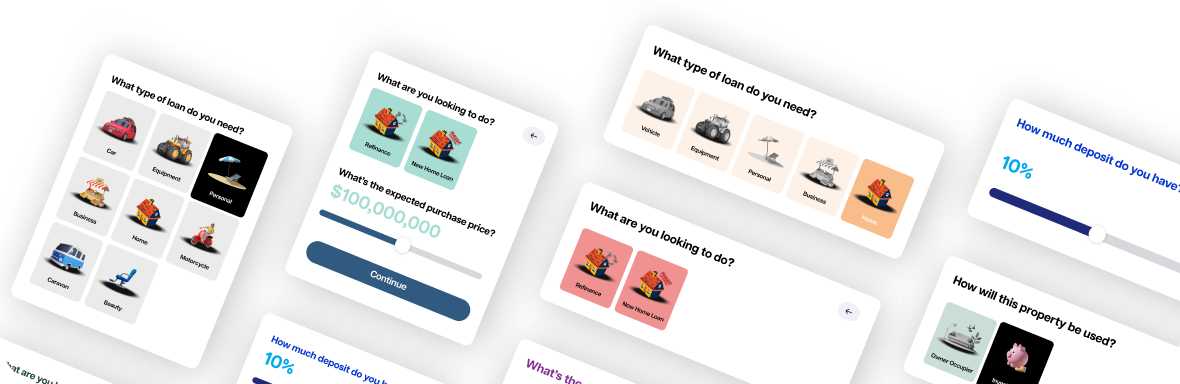
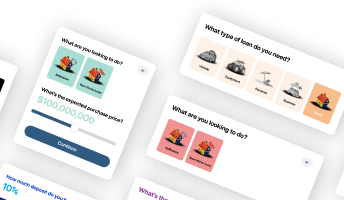
Desired Products
Choose with products you want to display.
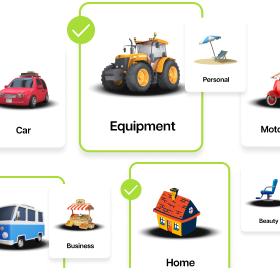
Desired Display
Pick your desired layout of the products.

#HEX codes
Choose your designs colour scheme.
Page source URL
Provide your parent page URL.
Desired Products
Choose with products you want to display.
Desired Display
Pick your desired layout of the products.
<div id=”repaymentWidget”></div>
<script>
(function() {
const params = new Proxy(new URLSearchParams(window.location.search), {
get: (searchParams, prop) => searchParams.get(prop),
});
if (params.partnerId) {
localStorage.setItem(“externalPartnerId”, params.partnerId);
} else {
// SET DEFAULT DRIVE IQ PARTNER (REQUIRED)
localStorage.setItem(“externalPartnerId”, “partner_ID”);
}
// HOST URL (REQUIRED)
localStorage.setItem(“sourceUrl”, “source_URL”); // Website URL where the Widget Tool is embedded
// Quote Source (REQUIRED)
localStorage.setItem(“source”, “source”); // Feeds into YOUx Manage as Quote source
// YOUx Manage Instance (REQUIRED)
localStorage.setItem(“targetSystem”, “target_system”); // POSSIBLE VALUE – SKYNET, MULTI_TENANT, HAL_9000
})();
</script>
<link rel=”stylesheet” href=”https://fonts.googleapis.com/css2?family=Open+Sans:wght@400;600&display=swap”/>
<link rel=”stylesheet” href=”https://s3.ap-southeast-2.amazonaws.com/widget.driveiq/prod/widgetToolVersion2/static/css/main.css”/>
<link rel=”stylesheet” href=”https://s3.ap-southeast-2.amazonaws.com/widget.driveiq/prod/widgetToolVersion2/static/css/main.css.map”/>
<script src=”https://s3.ap-southeast-2.amazonaws.com/widget.driveiq/prod/widgetToolVersion2/static/js/main.js” crossorigin></script>
<script src=”https://s3.ap-southeast-2.amazonaws.com/widget.driveiq/prod/widgetToolVersion2/static/js/main.js.map” crossorigin></script>
<div id=”widgetApplication” style=”width: 100vw; min-height: 100vh”></div>
<link rel=”stylesheet” href=”https://fonts.googleapis.com/css2?family=Open+Sans:wght@400;600&display=swap”/>
<link rel=”stylesheet” href=”https://s3.ap-southeast-2.amazonaws.com/widget.driveiq/prod/widgetApplicationVersion2/assets/css/all.css”/>
<link rel=”stylesheet” href=”https://s3.ap-southeast-2.amazonaws.com/widget.driveiq/prod/widgetApplicationVersion2/static/css/2.chunk.css”/>
<link rel=”stylesheet” href=”https://s3.ap-southeast-2.amazonaws.com/widget.driveiq/prod/widgetApplicationVersion2/static/css/main.chunk.css”/>
<script src=”https://s3.ap-southeast-2.amazonaws.com/widget.driveiq/prod/widgetApplicationVersion2/assets/js/all.js” crossorigin></script>
<script src=”https://s3.ap-southeast-2.amazonaws.com/widget.driveiq/prod/widgetApplicationVersion2/static/js/2.chunk.js” crossorigin></script>
<script src=”https://s3.ap-southeast-2.amazonaws.com/widget.driveiq/prod/widgetApplicationVersion2/static/js/main.chunk.js” crossorigin></script>
<script src=”https://s3.ap-southeast-2.amazonaws.com/widget.driveiq/prod/widgetApplicationVersion2/static/js/runtime~main.js” crossorigin></script>
<div id=”uploadDocument” style=”width: 100vw; min-height: 100vh”></div>
<script>
(function() {
const params = new Proxy(new URLSearchParams(window.location.search), {
get: (searchParams, prop) => searchParams.get(prop),
});
if (params.quoteId) {
localStorage.setItem(‘quoteId’, params.quoteId);
}
const quote = {
externalPartnerId:”, // Set the externalPartnerId value
sourceUrl:”, // Same sourceUrl as the Widget Tool
};
localStorage.setItem(‘quote’, JSON.stringify(quote));
// HOST URL
localStorage.setItem(‘sourceUrl’, ‘source_URL’); // Same sourceUrl as the Widget Tool
})();
</script>
<link rel=”stylesheet” href=”https://fonts.googleapis.com/css2?family=Open+Sans:wght@400;600&display=swap”/>
<link rel=”stylesheet” href=”https://s3.ap-southeast-2.amazonaws.com/widget.driveiq/prod/widgetApplicationVersion2/assets/css/all.css”/>
<link rel=”stylesheet” href=”https://s3.ap-southeast-2.amazonaws.com/widget.driveiq/prod/widgetApplicationVersion2/static/css/2.chunk.css”/>
<link rel=”stylesheet” href=”https://s3.ap-southeast-2.amazonaws.com/widget.driveiq/prod/widgetApplicationVersion2/static/css/main.chunk.css”/>
<script src=”https://s3.ap-southeast-2.amazonaws.com/widget.driveiq/prod/widgetApplicationVersion2/assets/js/all.js” crossorigin></script>
<script src=”https://s3.ap-southeast-2.amazonaws.com/widget.driveiq/prod/widgetApplicationVersion2/static/js/2.chunk.js” crossorigin></script>
<script src=”https://s3.ap-southeast-2.amazonaws.com/widget.driveiq/prod/widgetApplicationVersion2/static/js/main.chunk.js” crossorigin></script>
<script src=”https://s3.ap-southeast-2.amazonaws.com/widget.driveiq/prod/widgetApplicationVersion2/static/js/runtime~main.js” crossorigin></script>
Give Us A Call

Send Us An Email

